
Bolt Bridge
- home
- Apps
- Bolt Bridge
- Connect to HubRise

Connect to HubRise
Connecting Bolt to HubRise can be done in a few steps.
IMPORTANT NOTE: If you do not have a HubRise account yet, register on our Signup Page. It only takes a minute!
1. Enable HubRise on Bolt
As a first step, the HubRise integration must be enabled on your Bolt account.
Contact us at support@hubrise.com and include the following information for each of your locations:
- The URL of your Bolt page. For example: https://food.bolt.eu/en/324-valletta/p/199160-foodcrave/.
- The name and the address of your restaurant.
- The email address of the restaurant owner.
- Your HubRise location name and ID. For example:
Fast Pizza Baker Street z6q31-0.
We will contact Bolt on your behalf, and send you your Provider Integration ID when the integration is ready.
2. Connect Bolt Bridge
Set up the Bolt Bridge in HubRise by following these steps:
- Log in to your HubRise account.
- Select the location you want to connect from the dropdown menu.
- Select CONNECTIONS, then View available apps.
- Select Bolt Bridge from the list of apps.
- Click Connect.
- Click Allow to grant Bolt Bridge access to your registered location on HubRise. If your account has multiple locations, expand the Choose location section to select the desired location, and then click Allow.
The bridge now shows the connection page. Enter your Provider Integration ID and click Save.
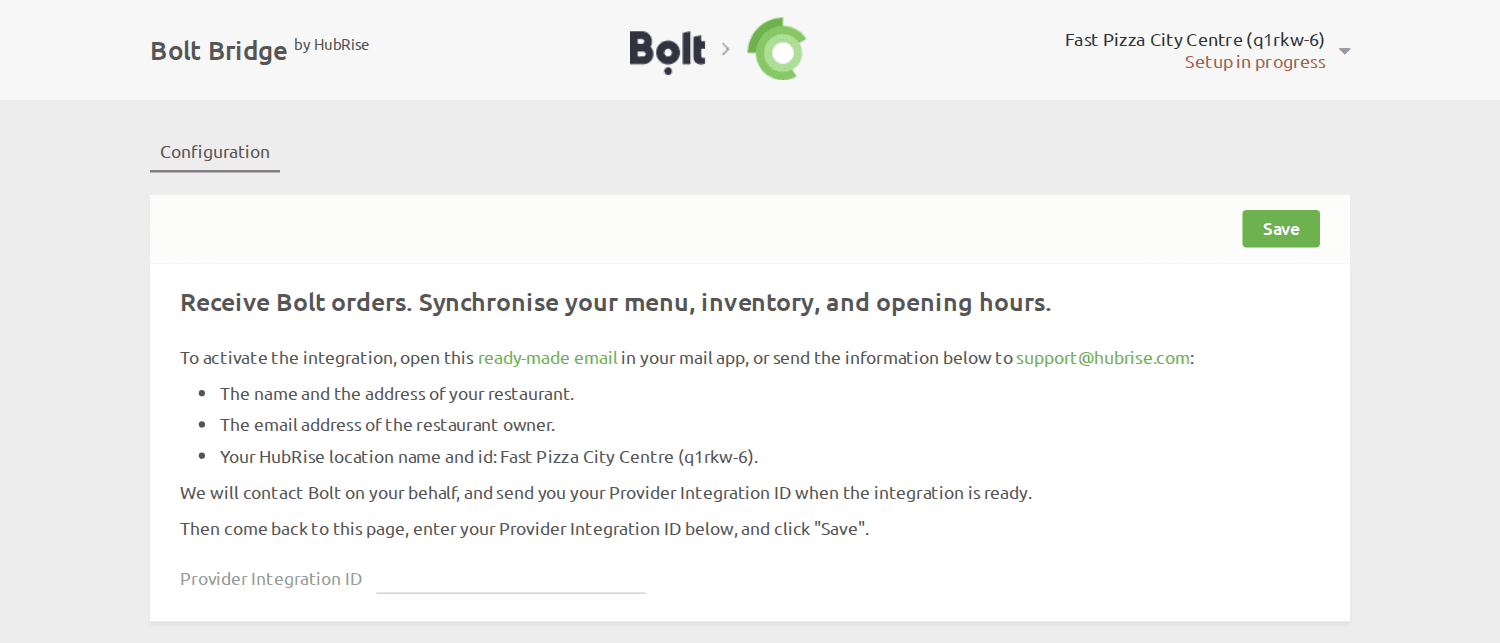
The Provider Integration ID is verified with Bolt when you save the page. If it is not recognised, the integration has most likely not been activated yet: contact us at support@hubrise.com so that we can enable it with Bolt.
3. Configure Your Preferences
After connecting the bridge, configure the parameters on the Configuration page for correct order transmission to your EPOS.
For more information about the configuration page, see Configuration.
4. Push Your Menu
For the Bolt integration to be fully operational, you need to push your HubRise catalog into Bolt.
To learn how to push your HubRise catalog into Bolt, see Push the Catalog. For more information on HubRise catalogs, see Catalogs.
5. Go Live
Once your catalog has been pushed, let us know at support@hubrise.com. We then ask Bolt to make the integration live for your store.
IMPORTANT NOTE: When the integration goes live, the Bolt tablet and Merchant App can no longer be used for receiving orders or updating your menu.
6. Receive Test Orders
You should place a few orders on your Bolt store, make sure they are correctly received by your EPOS, and then cancel them to get a refund. This will ensure that your integration is working as expected.
Bolt requires every order to be accepted quickly. If an order is not accepted in time, Bolt cancels it automatically and sets the store as not available. See Receive Orders for details.
If you encounter problems during the tests, contact us at support@hubrise.com.