


Uber Direct
- home
- Apps
- Uber Direct
- Connect to HubRise
Connect to HubRise
Connecting Uber Direct to HubRise can be done in a few steps.
IMPORTANT NOTE: If you do not have a HubRise account yet, register on our Signup Page. It only takes a minute!
1. Connect Uber Direct Bridge
To connect Uber Direct Bridge to HubRise, follow these steps:
- Log in to your HubRise account.
- Select the location you want to connect from the dropdown menu.
- Select CONNECTIONS, then View available apps.
- Select Uber Direct Bridge from the list of apps.
- Click Connect.
- Click Allow to grant Uber Direct Bridge access to your registered location on HubRise. If your account has multiple locations, expand the Choose location section to select the desired location, and then click Allow.
- Enter your Customer ID, Client ID, and Client Secret. To find out how to get these credentials, see Retrieve Uber Direct Credentials.
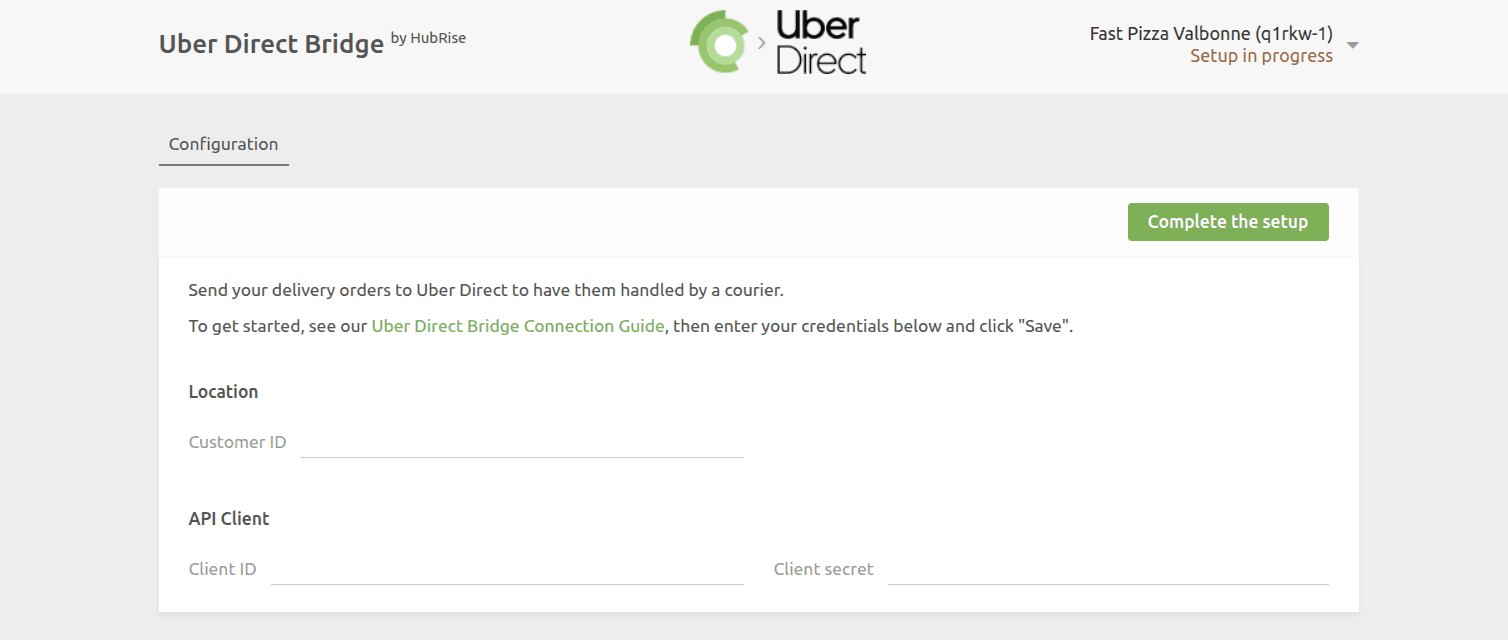
- Click Complete the setup. The bridge opens the Configuration page.
- Create a webhook in your Uber Direct account. See Set Up Webhook.
- Complete the configuration of the bridge. See Configure Your Preferences.
1.1. Retrieve Uber Direct Credentials
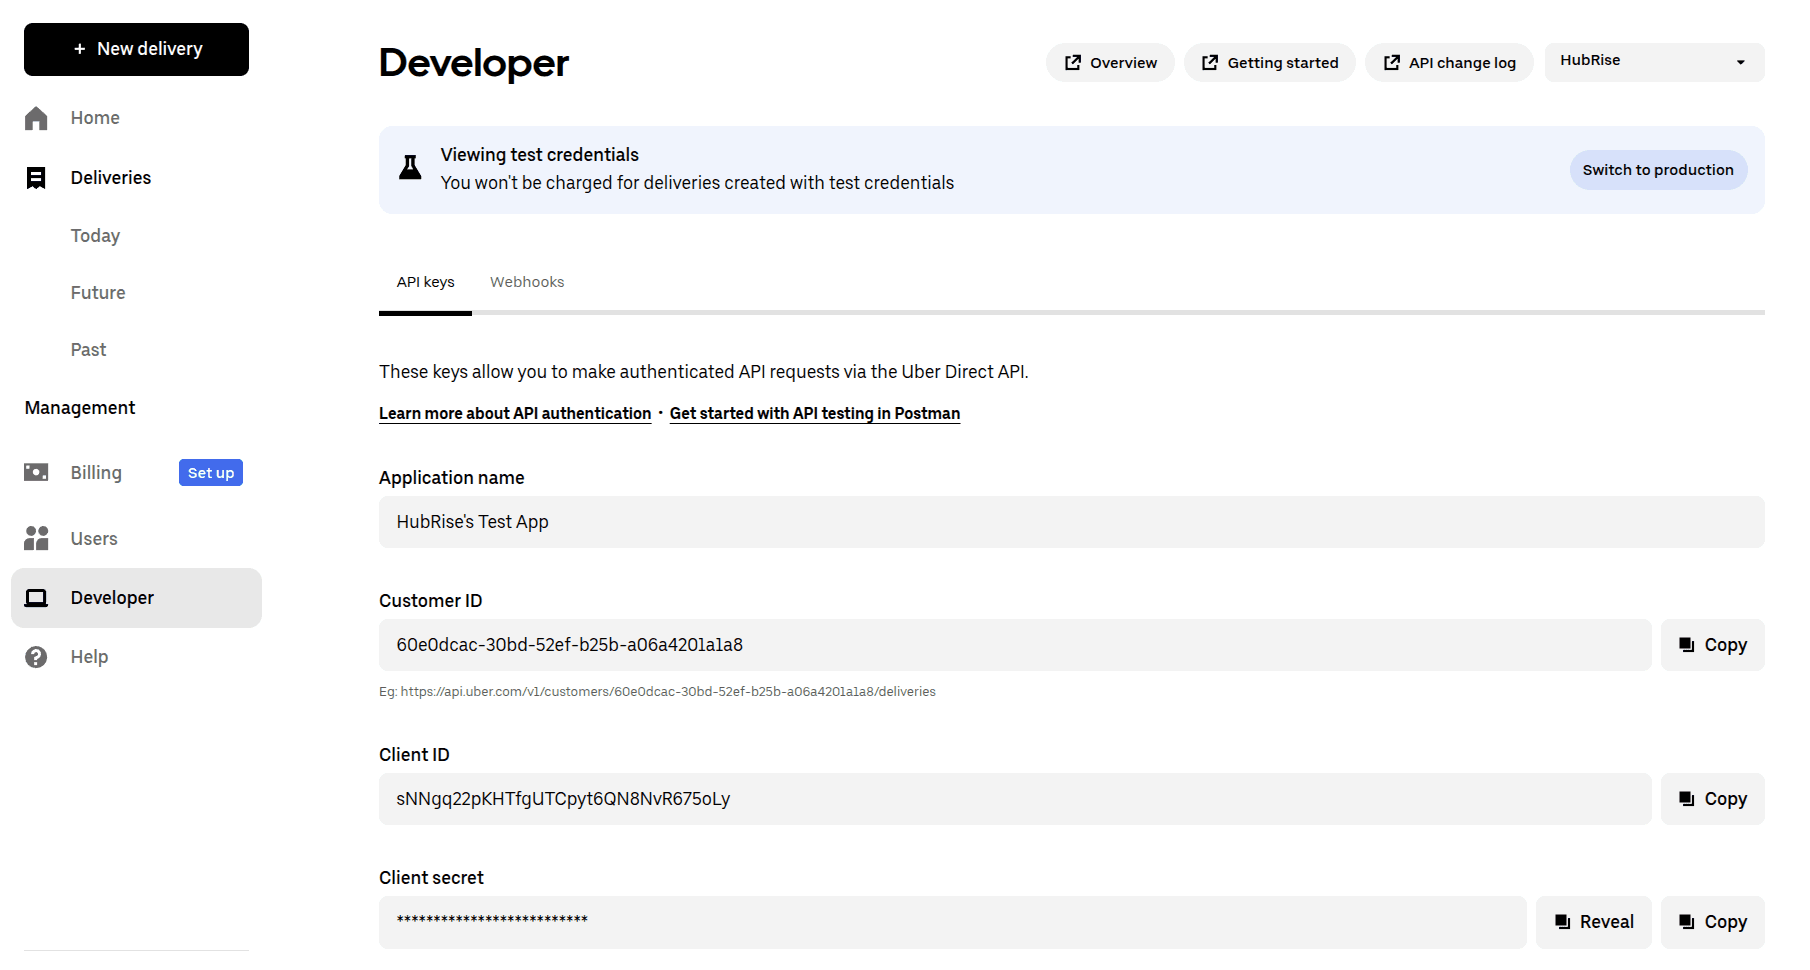
To retrieve your Customer ID, Client ID, and Client Secret:
- Log in to your Uber Direct account at https://direct.uber.com.
- Open the Developer tab.
- In the API keys section, find your Customer ID, Client ID and Client Secret, and copy their values.
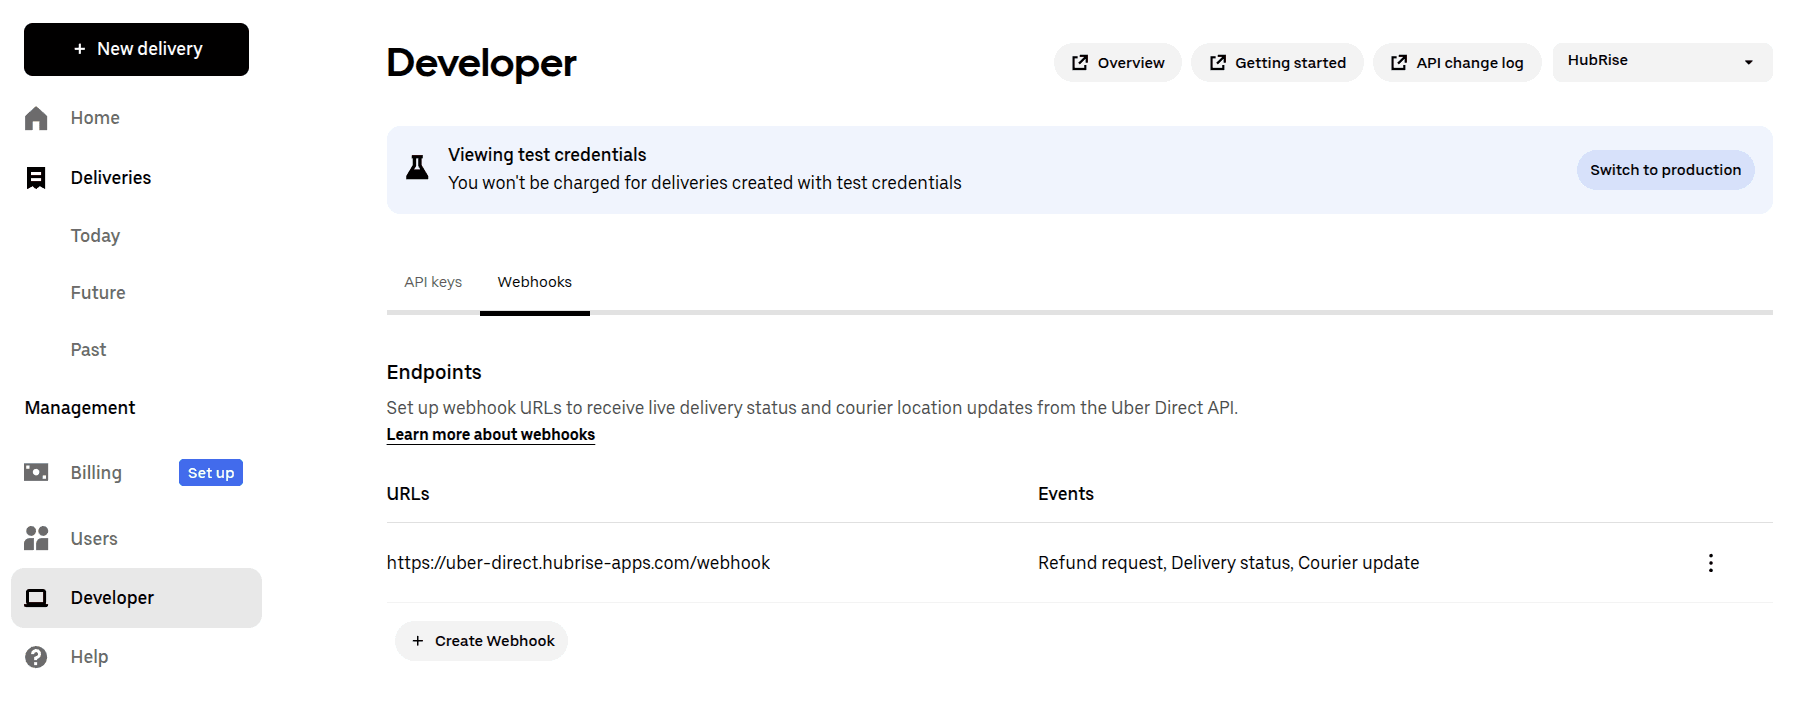
1.2. Set Up Webhook
Uber Direct uses webhooks to send delivery updates to HubRise. You need to configure the webhook URL and retrieve the signing key.
To configure the webhook:
- Log in to your Uber Direct account at https://direct.uber.com.
- In the Developer tab, go to the Webhooks section.
- Click Create Webhook
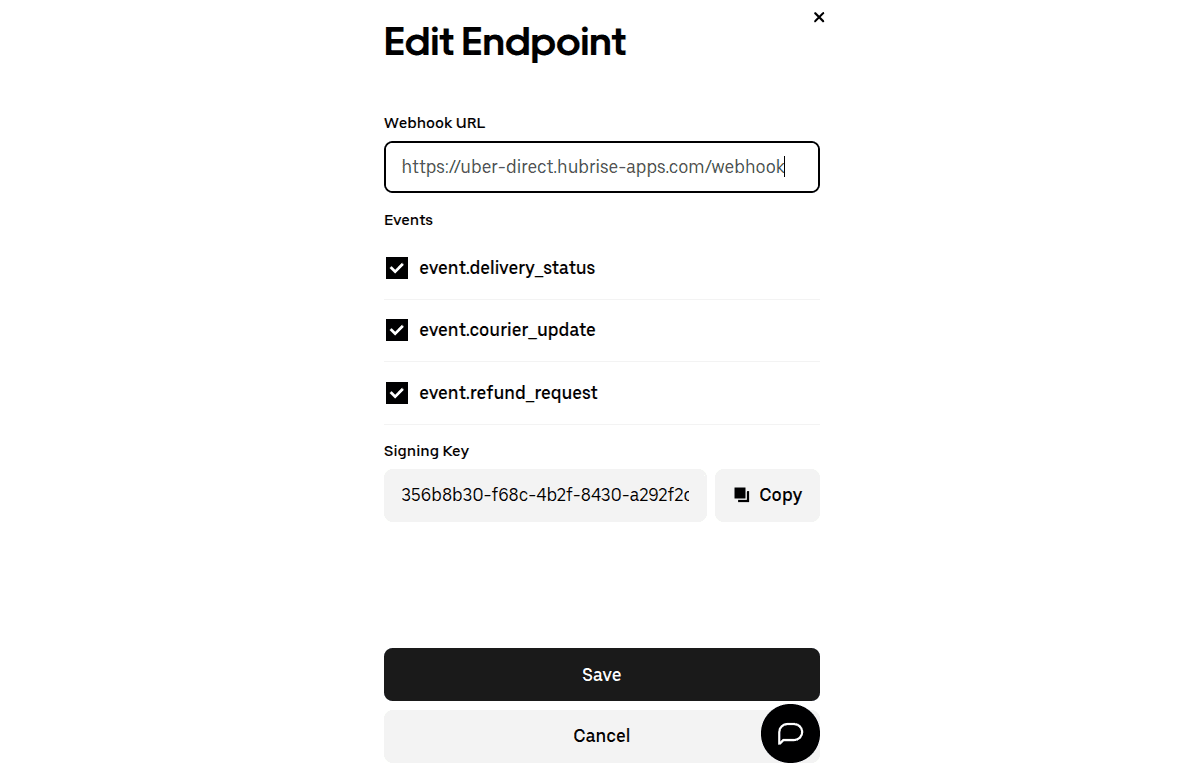
- Enter the following Webhook URL:
https://uber-direct.hubrise-apps.com/webhook - Select all event types:
event.delivery_status,event.courier_updateandevent.refund_request. - Click Save.
You will need the webhook signing key to complete the bridge configuration. To retrieve it:
- In the Webhooks section, click the three dots next to the webhook you just created.
- Select Edit.
- Copy the Signing Key.
2. Configure Your Preferences
After connecting the bridge, you need to configure the parameters on the Configuration page for correct operation. This includes:
- Webhook signing key
- Business information (name, phone number, address)
- Delivery criteria and booking preferences
For more information about navigating the bridge, see User Interface. For details on how to configure the parameters of Uber Direct Bridge, see Configuration.
3. Test the Integration
After saving your configuration, your Uber Direct integration is ready to use.
To ensure everything is working correctly, perform the following tests:
- Create a test order in a connected application, such as your online ordering system or EPOS.
- Verify that the order triggers a quote or delivery request in Uber Direct, according to your settings.
- If a delivery was requested, check that delivery status updates are received in HubRise.
If you encounter problems during the tests, contact us at support@hubrise.com.