


Mailchimp
Configuration
The configuration page allows you to customise the behaviour of Mailchimp Bridge based on your preferences.
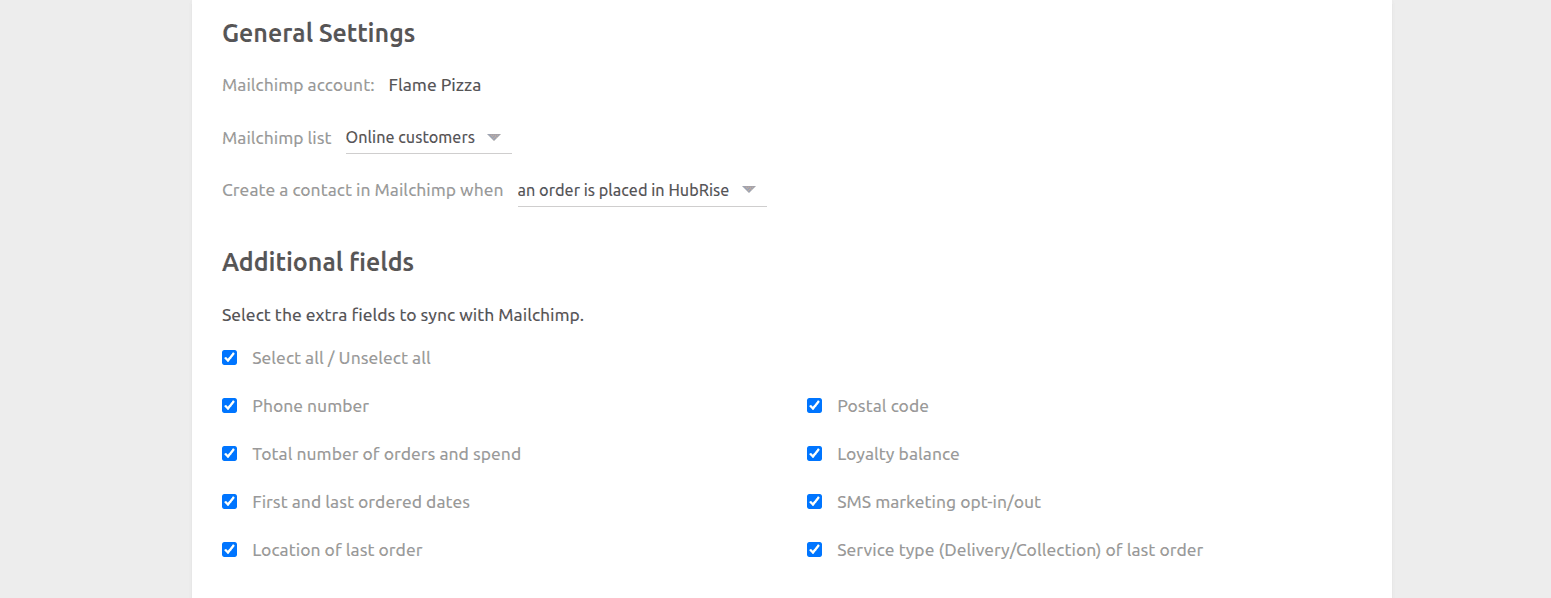
General Settings
-
Mailchimp account: Displays the Mailchimp account connected to your HubRise location.
-
Mailchimp list: Indicates the Mailchimp Audience where customers are exported. You can select the desired audience from the drop-down list. The selected audience is also displayed in the Mailchimp header, below your business name.
-
Create a contact in Mailchimp when: Defines when a contact is created in Mailchimp. You can choose from:
- An order is placed in HubRise – Recommended
When an order is placed, both customer details and order information are available, allowing more data to be attached to the Mailchimp member. See Additional Fields for more information. - A customer is added to HubRise (obsolete)
This mode does not include order details, and is no longer recommended.
- An order is placed in HubRise – Recommended
Additional Fields
Additional information can be sent to Mailchimp when An order is placed in HubRise is selected.
All fields except SMS marketing opt-in/out are exported as merge fields in Mailchimp. The SMS marketing opt-in/out field is sent as a member tag.
For more details on how customers are synced with Mailchimp audience members, see Sync Customers.
Save the Configuration
To save the configuration, click Save at the top of the page.
Reset the Configuration
If you need to reset the configuration, click Reset the configuration at the bottom of the page.