Catalog Manager
- home
- Apps
- Catalog Manager
- Option Lists and Options
Option Lists and Options
Options are additional items which customers can add to a product when ordering.
When you create a product, you can associate it with one or several option lists. Option lists need to be created before you can relate them to a product. Option lists might differ from one product variation to another; for example, additional toppings on a medium pizza could be cheaper than those offered on a large pizza.
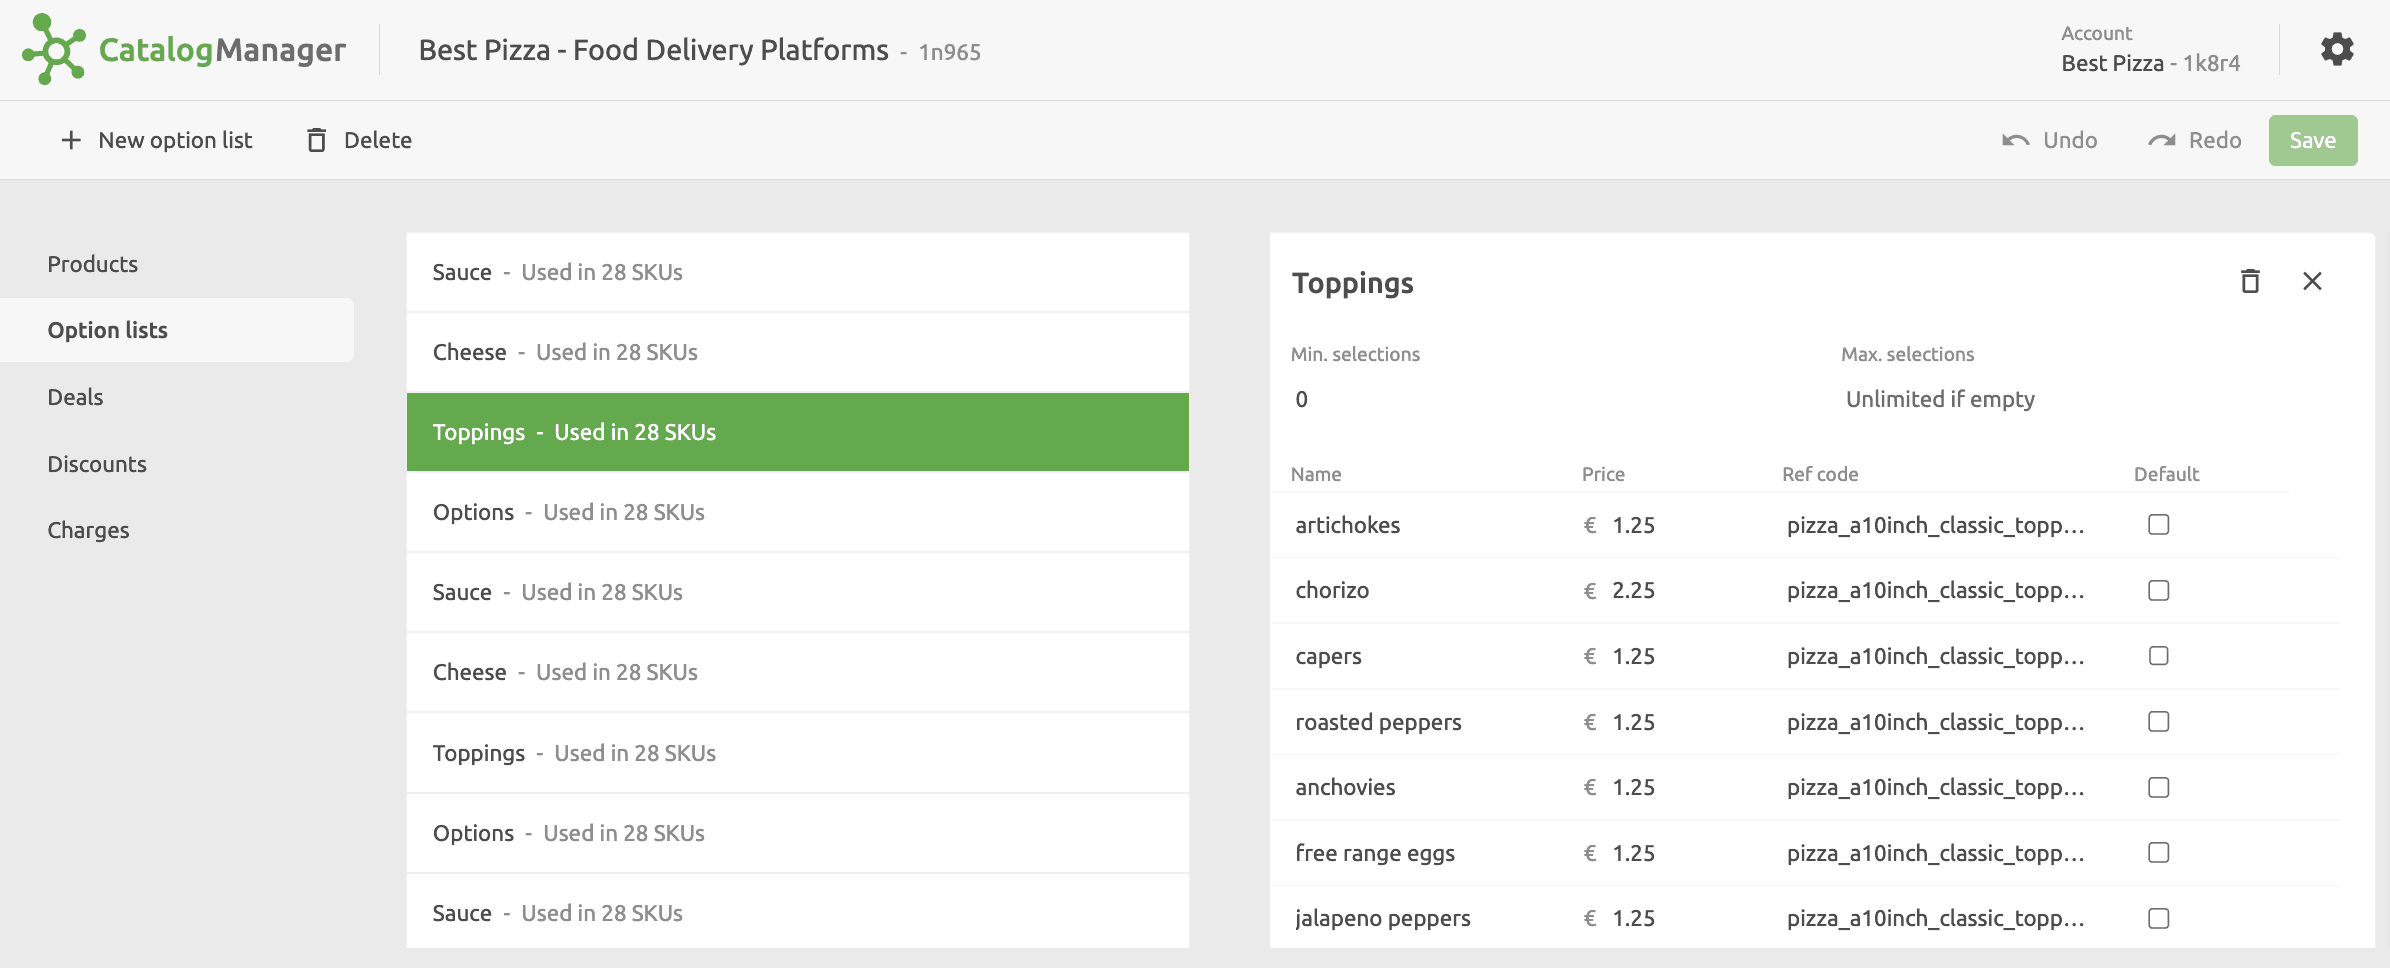
When viewing option lists, you can see the number of SKUs or products that the option list is used in. This helps you track of which options are used in which products.
Create Option Lists
Option lists can be added to the base product, if there are no product variations, or to each product variation when these are present.
Option lists need to be created before they can be related to product items. To create an option list, click Option lists on the left hand side menu panel, then select New option list. The following information is required:
- Name
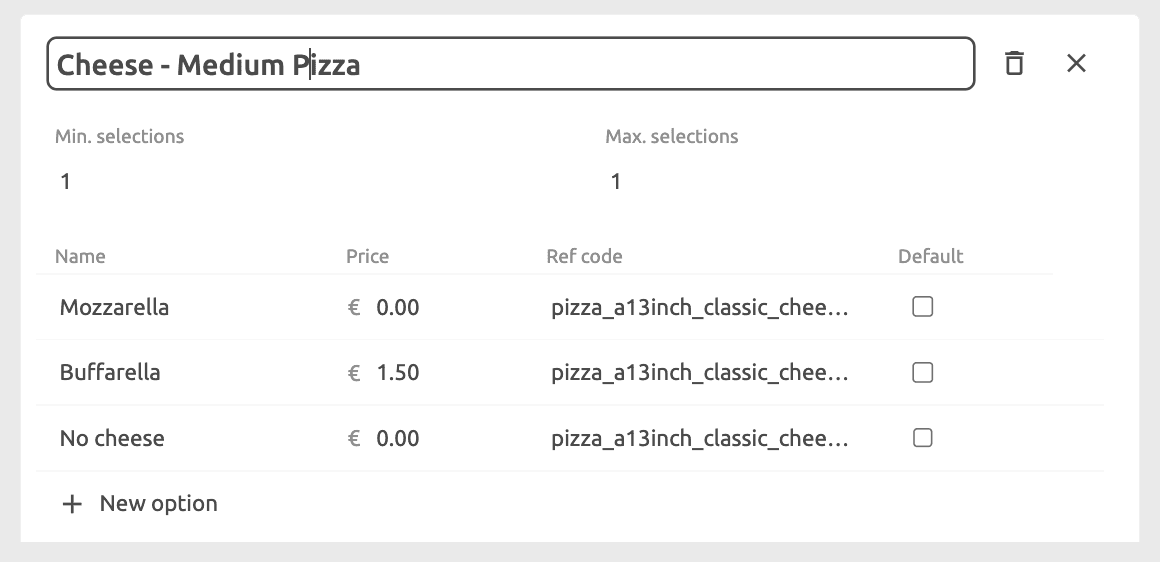
- Minimum number of options a customer can select. Defaults to
0. - Maximum number of options a customer can select. Defaults to empty, which means that there is no limit.
- For each option, enter a Name, Price, Ref code, and tick the Default checkbox if the option should be selected by default.
Keep in mind that option lists are attached to specific products, or product variations. If the options differ from one product variation to another, it is advisable to name your option lists in a way that allows you to easily identify them. For example, for pizza items you may have three cheese options. If the options and related prices are identical regardless of the pizza or pizza size they're attached to, the list can be called Cheese - Pizza. If they are different, you might call one list Cheese - Medium Pizza and the other Cheese - Large Pizza to easily find the list you want to attach.
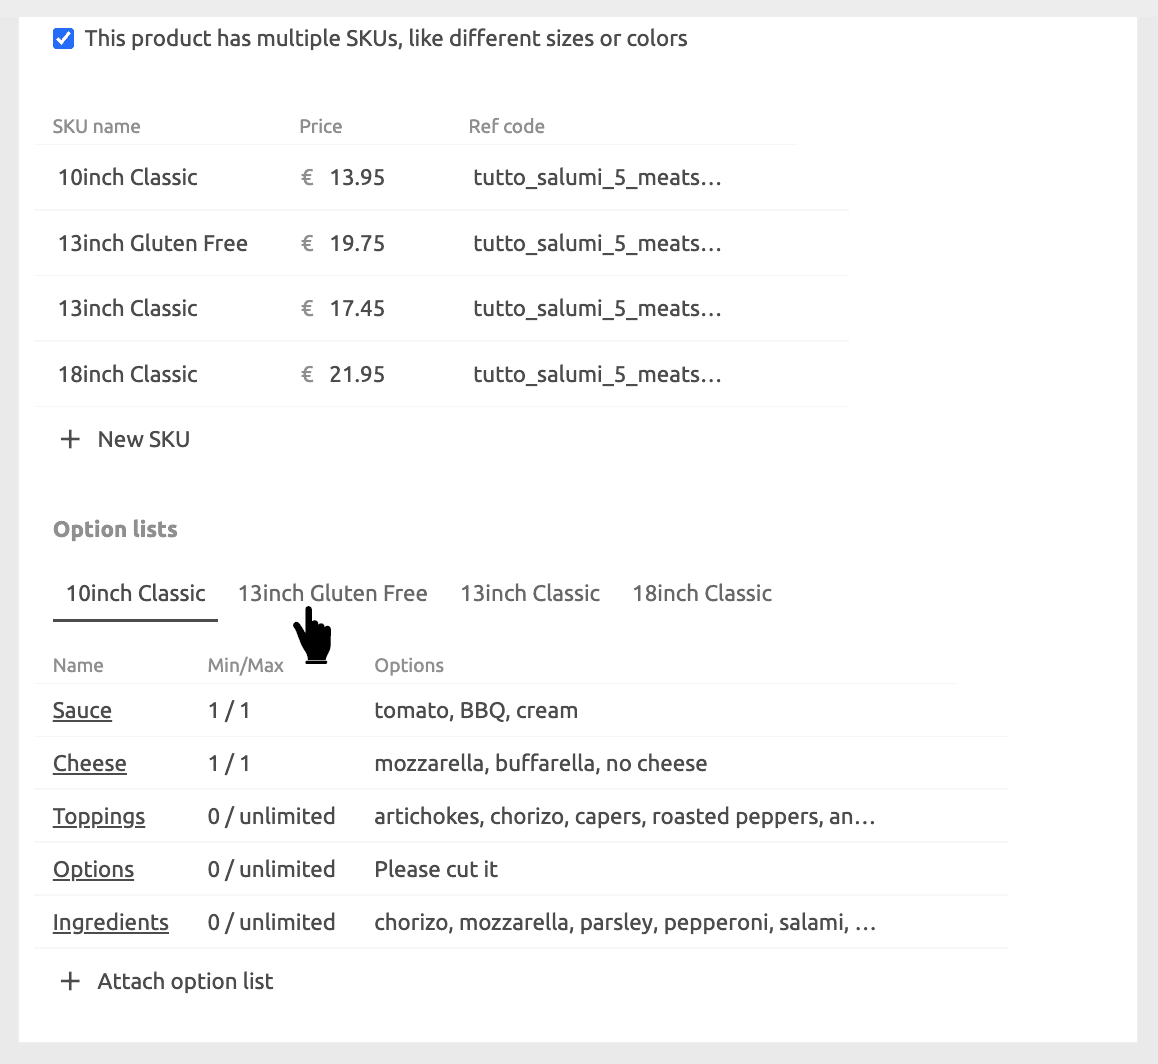
After you have created one or more option lists, you can attach them to your products:
- Select the tab for the product variation that you want to attach option lists to, for example
10inch Classic. - Click Attach option list, then select the option list to attach from the dropdown list.
- Repeat for each other product variation.
Delete an Option List
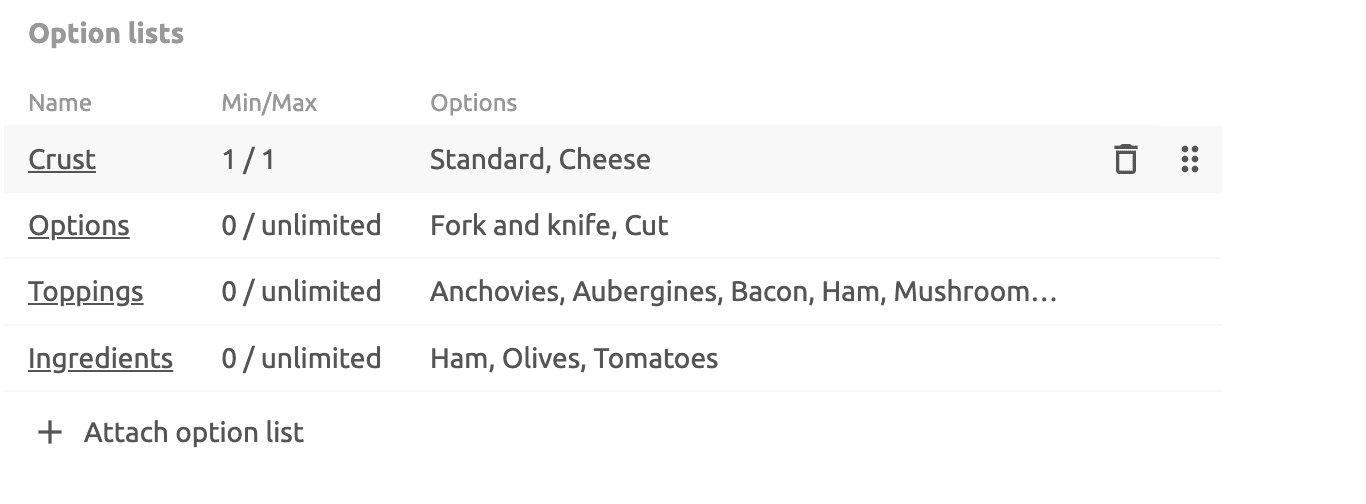
To delete an option list, select it from the list and click the delete icon in the option list details pane. Deleting an option list automatically removes it from any products it is related to.
Rearrange Option Lists
To change the order in which option lists are displayed in the catalog, drag the option list using the drag handles on the right of the option list block. This does not affect how option lists are displayed in a product, but it can be useful for organising your option lists.
To change the order in which option lists are displayed in a product, go to Products, select the product where you want to edit the order, then drag the option list using the drag handles on the right of the list. The order in which option lists are displayed in a product is maintained in the apps you push the catalog into.